
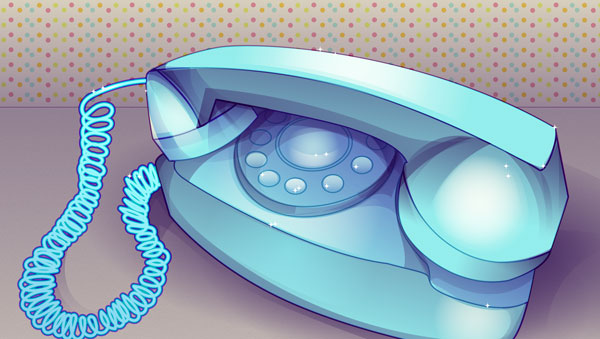
I'd like to share with you today a quick tutorial on creating a retro phone illustration in Adobe Illustrator. This is a get taster of my new Tuts+ course, Mastering Sketch Design in Illustrator.
In that course, you’ll dive right in and create a still life entirely in Illustrator. You’ll learn to sketch it all out with various drawing tools, and render your objects with layered gradients, transparent shapes, and various Blending Modes. By the end of the course, you’ll know how to freely sketch, draw, and paint complete designs in Illustrator without using any additional applications.
1. Create the Phone
Step 1
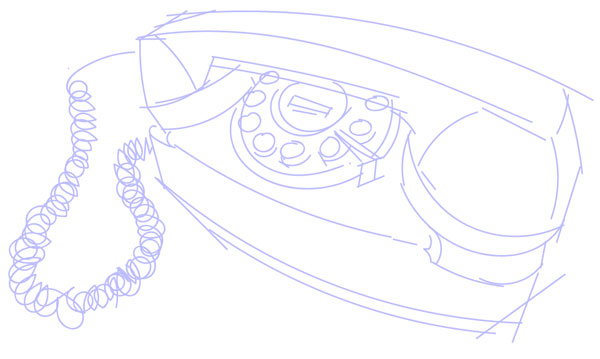
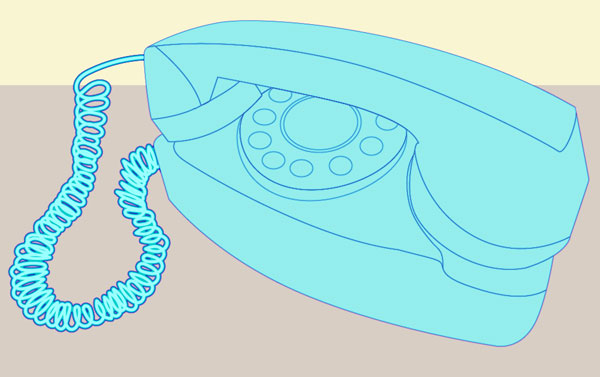
Start with a simple, quick sketch of an object. You can use a stock photo for reference, set up a still-life, or a photo of your own. I used the Paintbrush Tool (B) and the default Calligraphic Brush in quickly sketching out this Princess telephone. Group (Control-G) together your stroked lines and reduce the group's Opacity to 40% in the Transparency panel.
Step 2
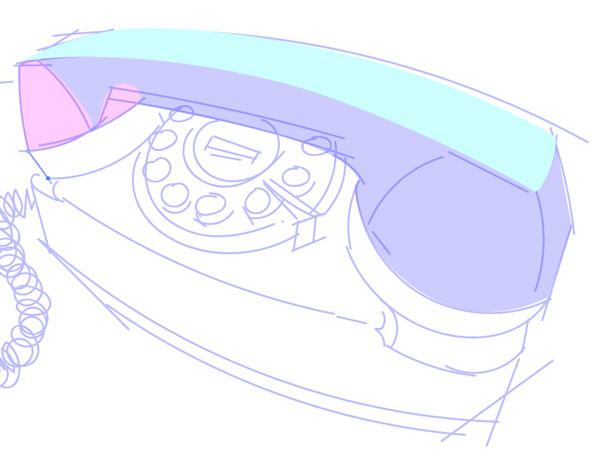
Using the Pen Tool (P), I traced each section of the phone. In order to keep each plane separate for when I create the line art, I changed colors frequently.
Step 3
Continue tracing each section of the object until you have the entire thing drawn out. It's up to you how detailed you choose to make your drawing. Hide the sketch group in the Layers panel. We'll handle the phone's cord later.
2. Creating the Line Art
Step 1
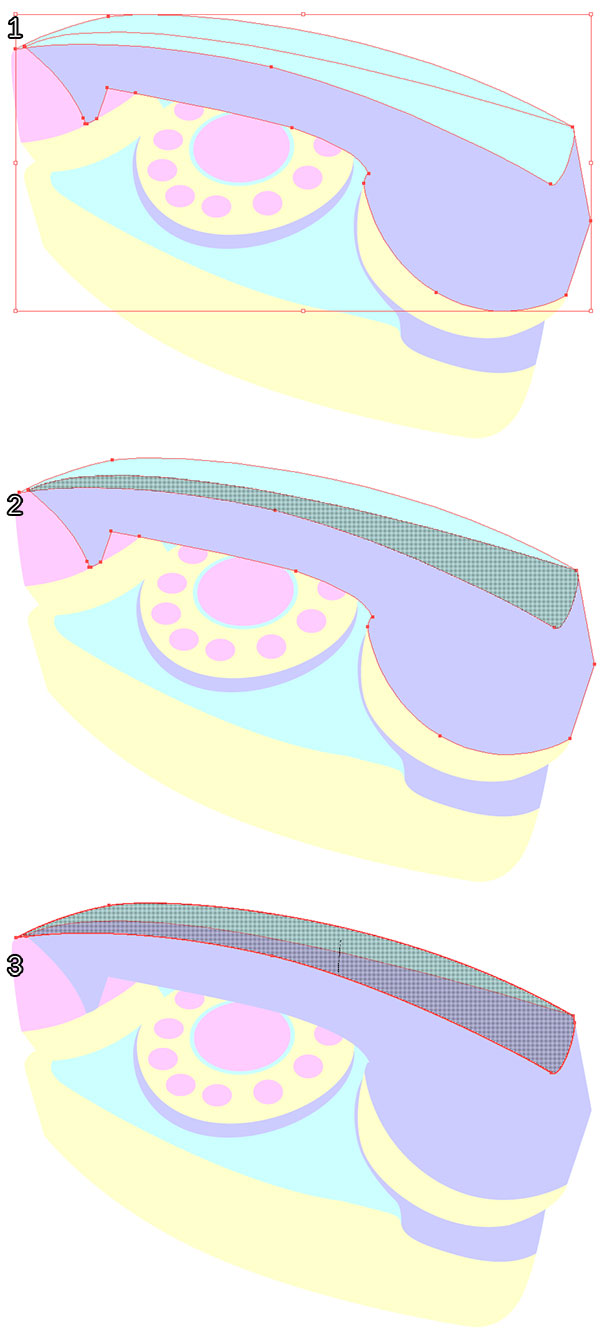
In order to create the line art, I found it easiest to use the Shape Builder Tool (Shift-M)in order to separate overlapping portions of objects so each shape ends where the next begins.
- Select two overlapping shapes.
- With the Shape Builder Tool in use, select the intersecting portion of the two shapes.
- Deselect the bottom shape and combine the top two into a single shape.
Repeat this technique throughout your object and Group everything together.
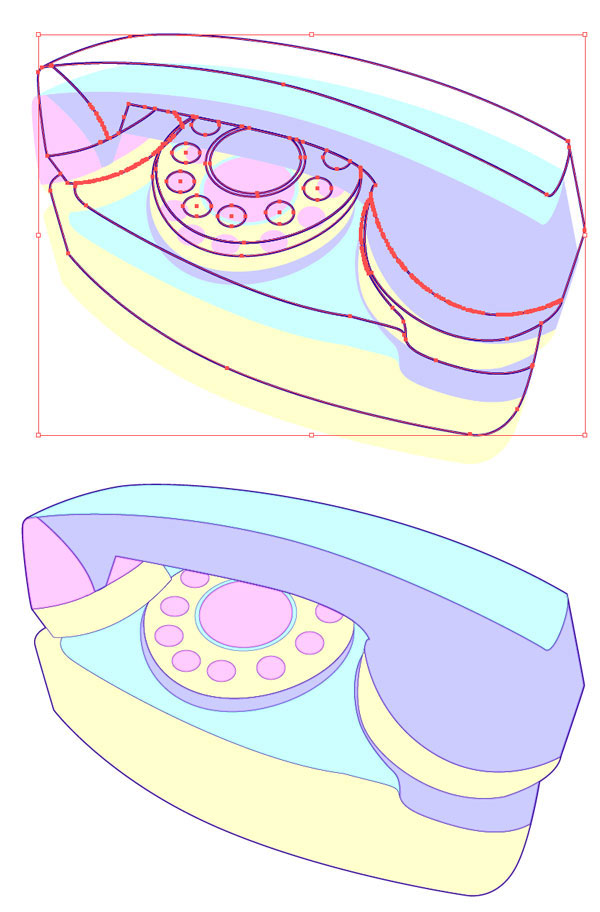
Step 2
Copy (Control-C) and Paste (Control-V) the object group and change the fill color to null and the stroke color to a dark purple, blue, or black. In the Stroke panel, set the caps and corners to Rounded and the Stroke Weight to 3pts. In the Transparencypanel set the Blend Mode to Overlay. Paste another line art group and set the Blend Mode to Normal, Opacity to 60%, and the Stroke Weight to 0.5pt. Align both line art groups with the main object group.
3. Drawing the Phone Cord
Step 1
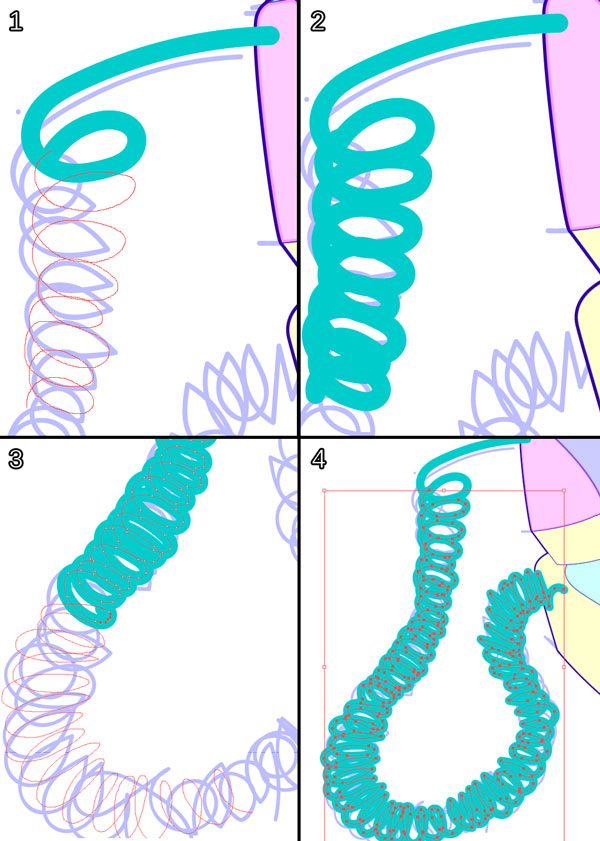
Using the Pencil Tool (N), set the Stroke Weight to 10pts and start drawing a spiraled line. In order to keep the line from being deformed, I set the Fidelity toSmooth in the Pencil Tool's Options. You'll find that the line can only be drawn for so long, so make you you can Edit Selected Paths (again in the tool's options) and pick up where you left off in order to have the phone cord be one complete path.
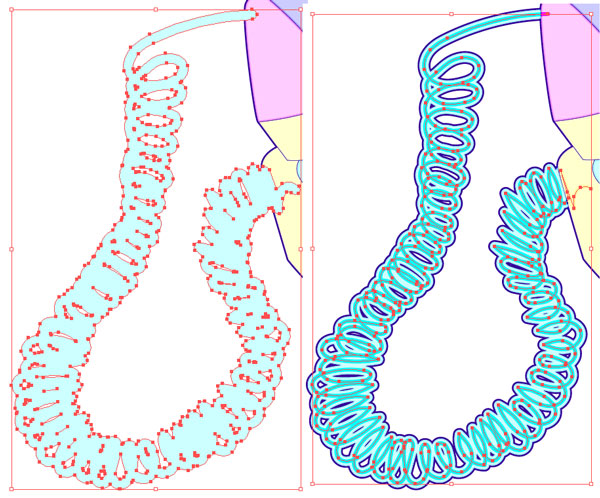
Step 2
Copy and Paste the cord. Hide or set the copy aside. Expand your cord under Object. Set the fill color to whatever your phone will be (in this case a blue). Copy and Paste the expanded cord line twice and use the same settings for the cord's line art as was used for the phone in the previous section. Unhide the stroked cord line, set the Stroke Weight to 2-4pts, the color to something lighter than your cord base color, and the Blend Mode to Overlay. Group together all cord objects and place behind the phone group.
4. Render the Phone
Step 1
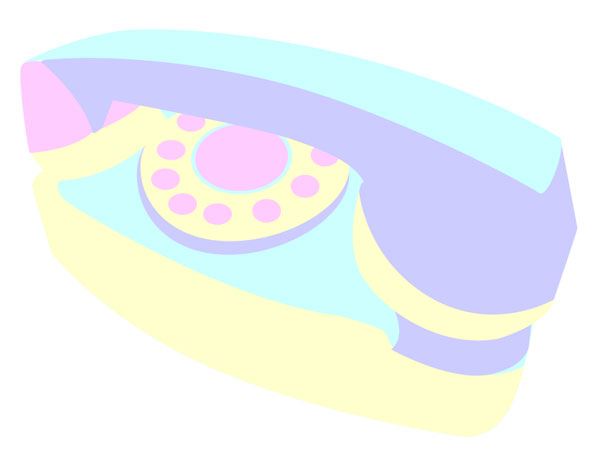
Choose a color for your phone to be. I chose a pastel blue, as seen in the phone cord in the previous section. Typically, Princess phones come in assorted pastels.
Step 2
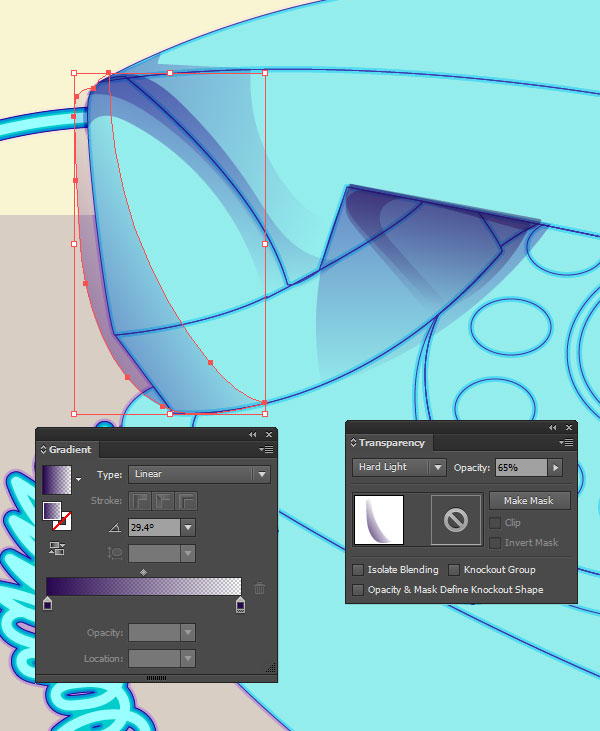
Start with shadows: cast, form, core, and middle tone areas. I drew gradient shapes with the Pencil Tool and layered them on top of each other. The gradient is dark purple at 100% Opacity to 0% Opacity. The Blending Modes vary from Hard Light toNormal, each shape's overall opacity varies from 40%-100%, and I altered the angles of the gradients with the Gradient Tool (G).
Step 3
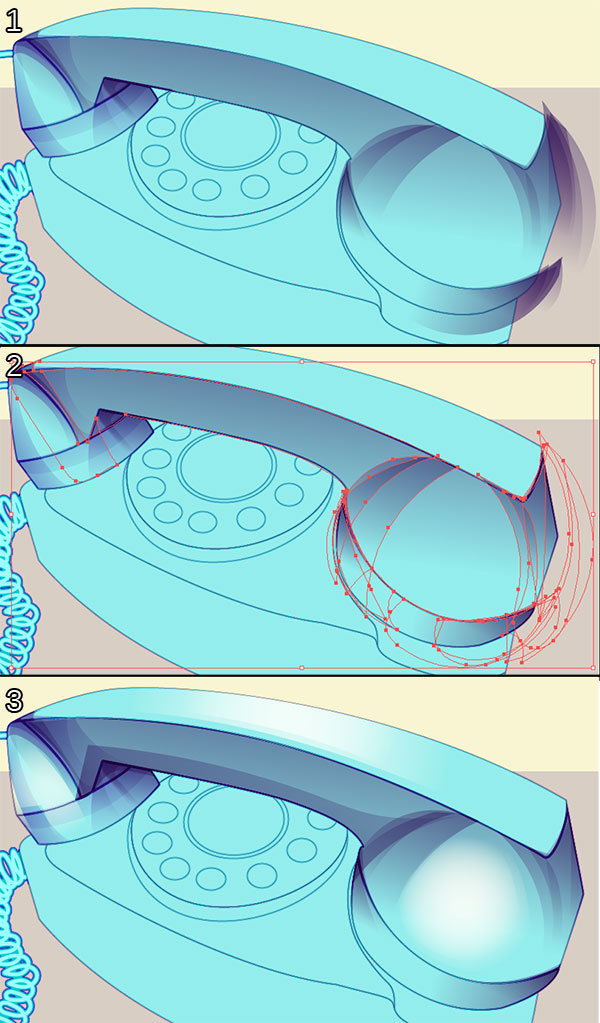
In the case of this phone there's three main sections that will be rendered: the handset, the top of the housing (where the dial is), and the front of the housing (facing the viewer). Copy and Paste the phone base group and Unite the shapes in each of these sections in the Pathfinder panel. You should have three phone pieces. These will be used to Make Clipping Masks (Control-7).
- Group together your shadow gradient shapes you worked on throughout the previous step.
- Select the newly united handset shape. Make sure it aligns with the rest of the phone illustration and is above the shadow gradient group in the Layerspanel. Make a Clipping Mask either by hitting Control-7 or going to Object > Clipping Mask > Make.
- Continue creating shadow and highlight gradients. For the highlights, I used a Radial Gradient of light yellow (similar to what's used for the background) at 100% to 0% Opacity. The Blend Mode was set to Overlay and I reduced the overall Opacity of each shape to 60% in the Transparency panel.
Step 4
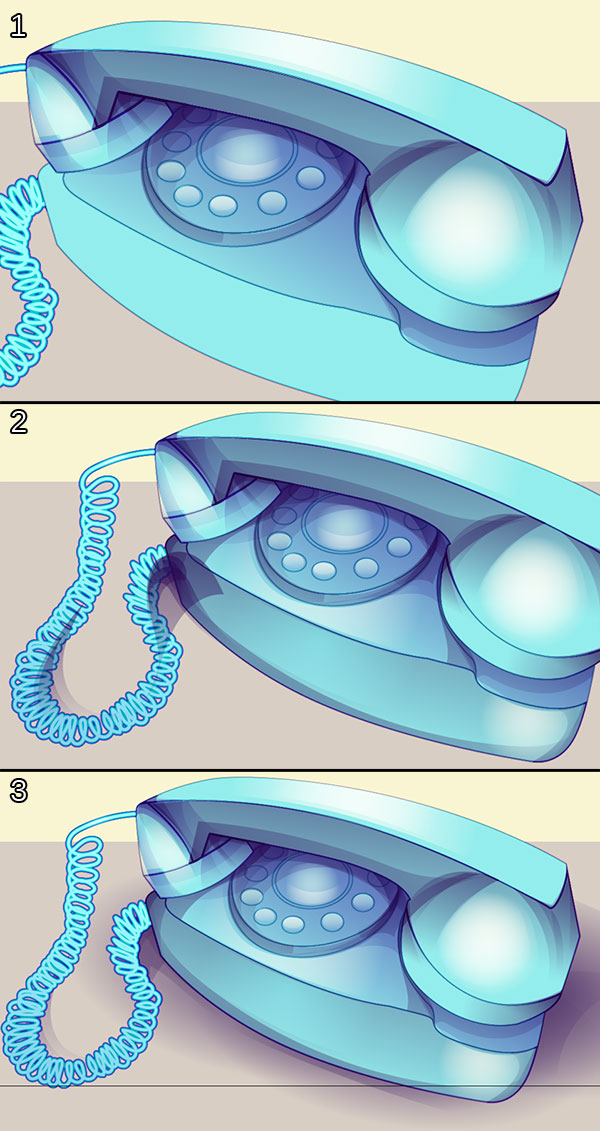
- Continue working on each section of the phone. Consider how the handset is casting shadows onto the housing.
- When you've finished rendering the phone, Group everything together and create cast shadows on the background below the phone. In this case, it'll be carpeting, so no highlighting (for a shiny table or floor) will be needed.
- Some of the shadows are large shapes drawn with the Ellipse Tool (L) with a Radial Gradient version of the shadow gradients used previously. Three of them are layered beneath the phone group which keeps some of the shadows harsh and dark, and others diffused. When finished, Group together all of your shadow layers.
5. Background and Final Touches
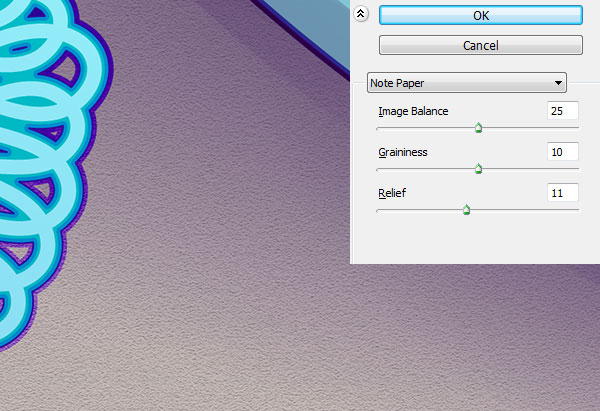
Use the Rectangle Tool (M) to draw two large rectangles to create your background. The floor has been created from three separate layers: a flat gray color, a gradient layer using the same shadow gradient from earlier in this tutorial, and an additional gray layer with the Note Paper effect applied in the Appearance panel with the settings seen below. The Note Paper layer is, finally, set to Multiply, and all three are Groupedtogether.
Step 2
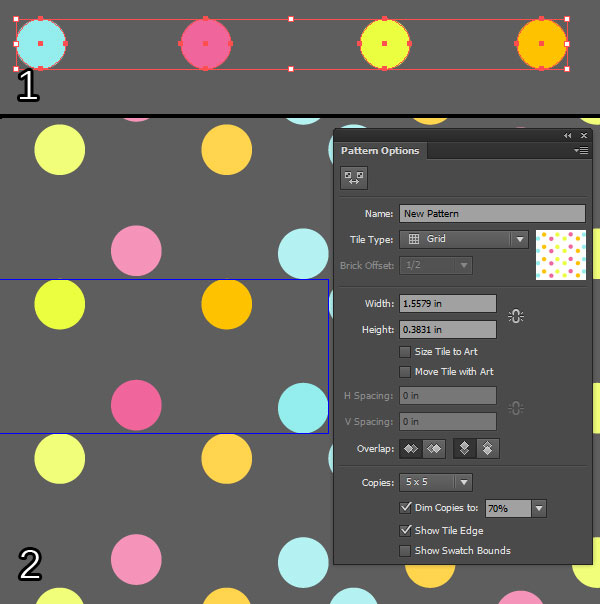
For the polka dots in the background, draw four small circles with the Ellipse Tool, making each one a different color. Copy and Paste all four so you have two staggered lines of circles. Select all eight circles and create a new pattern in the Pattern Optionspanel. Use this for a layer above the yellow background and set it to Multiply.
Step 3
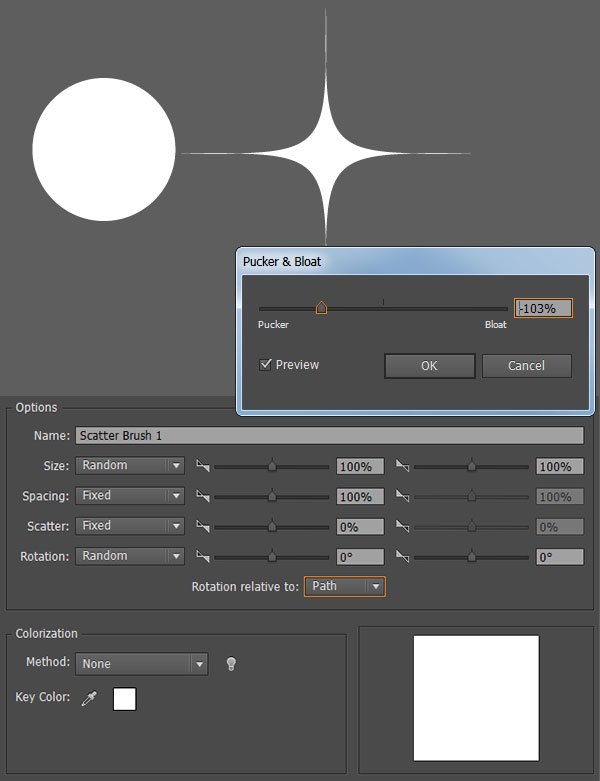
Finally, let's add some sparkles as a finishing touch. Draw a small white circle with the Ellipse Tool and apply the effect under Effects > Distort & Transform > Pucker & Bloat. Set the Pucker percentage to 103 and Expand the shape under Object. Either Copy and Paste the sparkle around your composition, or create a Scatter Brush. Go to the Brushes panel, select New Brush and choose Scatter Brush. Choose from the options below in creating your brush, hit OK, and use the Paintbrush Tool to scatter sparkles around your illustration.
Great Job, You're Done!
Now that you've completed this teaser tutorial, check out the full course, Mastering Sketch Design in Illustrator. In it you'll sketch out your composition with a series of thumbnails, utilize 2-point perspective in order to create an 80's inspired still life, create perfect line art, render each object, and create a fun patterned background to bring it all together.

0 Response to "Create a Retro Phone Illustration in Adobe Illustrator"
Post a Comment
Tolong setelah membaca harap berkomentar atau membagikan link web site ini.